Few desserts possess the timeless elegance and comforting simplicity of a classic vanilla custard. It is a foundational pillar of pastry arts, acting as a versatile canvas for countless sweet creations around the world. Whether served warm on a chilly evening, chilled as a refreshing summer treat, or used as a luxurious filling for pastries, a well-made custard is the epitome of culinary comfort.
When executed perfectly, a vanilla custard is a sensory delight. It features a silky, velvet texture that glides effortlessly across the palate, carrying a balanced sweetness and the unmistakable, deep aroma of real vanilla.
However, achieving this level of perfection requires a gentle hand and an understanding of the science behind egg-based desserts. Many home cooks struggle with common frustrations like curdling, lumping, or a heavy egg flavor that ruins the dessert experience.
This comprehensive guide will walk you through the essential techniques, ingredients, and step-by-step methods needed to master the classic vanilla custard, ensuring a smooth, flawless, and premium dessert every single time.
The Science of Custard Thickening
At its core, a custard is a delicate emulsion of dairy and eggs, thickened through the precise application of heat. Unlike flour-based sauces that rely on starch gelatinization, a pure custard depends on the coagulation of egg proteins to create its structure.
When egg proteins are heated, they unpack and bond with each other, trapping the liquid milk or cream within a delicate, microscopic mesh network.
Managing this thermal reaction is the secret to a smooth finish. Egg yolks begin to thicken at around 140°F, and they can easily curdle or scramble if the temperature climbs too high too quickly.
By introducing sugar into the yolks before heating, you raise the temperature at which the proteins coagulate, giving you a wider safety window. Understanding that time and temperature are your primary controls will help you approach the stovetop with absolute confidence.
Selecting Premium Ingredients for Maximum Flavor
Because a classic custard contains very few ingredients, the quality of each component directly impacts the final flavor and texture. You cannot hide subpar ingredients in a dish this simple, meaning each choice must be deliberate.
First, always opt for fresh, high-quality egg yolks. The yolks provide the essential fats, emulsifiers, and proteins that give custard its signature rich mouthfeel and beautiful pale-yellow hue. Avoid using whole eggs for a premium custard, as egg whites contain less fat and can introduce a sulfurous aroma when heated.
Second, the choice of dairy sets the baseline for richness. Whole milk is the traditional standard, providing a clean flavor and a light texture. For a more decadent, restaurant-style custard, substituting a portion of the milk with heavy cream creates an exceptionally luxurious body.
Third, vanilla is the absolute star of the show. While artificial vanilla extract is convenient, it cannot compete with the complex, woody, and floral notes of pure vanilla extract or a real vanilla bean pod. Using a real bean pod allows you to scrape thousands of tiny black seeds directly into the dairy, creating a visually stunning presentation and a deeply authentic flavor profile.
The Art of Tempering Eggs Safely
The most critical phase of making custard on the stovetop is a culinary technique known as tempering. This process gently introduces the cold egg yolks to the hot dairy without shocking them into scrambled eggs.
Start by heating your milk, sugar, and vanilla seeds in a heavy-bottomed saucepan over medium-low heat until it reaches a gentle simmer.
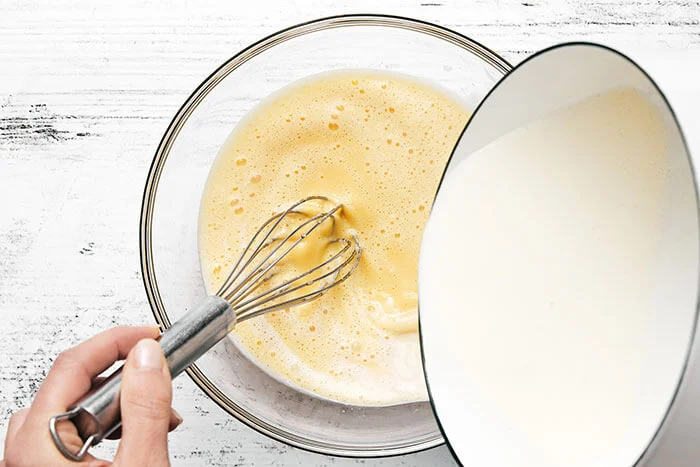
While the dairy is heating, whisk your egg yolks and remaining sugar together in a separate, large heatproof bowl until the mixture becomes pale, thick, and slightly ribbon-like.
Once the milk is hot, ladle a small amount of the simmering liquid into the egg mixture while whisking vigorously with your other hand. This slow introduction gradually warms the eggs and dilutes them, making them highly resilient to the heat.
Continue adding the hot milk a ladle at a time until roughly half of it is incorporated into the bowl. Now, you can safely pour the tempered egg mixture back into the remaining hot milk in the saucepan, confident that your eggs will remain perfectly smooth.
Mastering the Stovetop Cook
With the ingredients unified in the saucepan, return the pan to low heat. This stage requires your undivided attention and constant motion. Use a heat-resistant rubber spatula or a wooden spoon to stir the liquid continuously, ensuring you scrape the bottom and corners of the pan where scorching is most likely to occur.
Keep the heat exceptionally low and steady. As you stir, you will notice the liquid transition from a watery consistency into a rich, coating sauce.
The classic test for doneness is checking if the custard coats the back of your spoon. Dip the wooden spoon into the custard, lift it out, and draw your finger across the back. If the line remains clean and sharp without the custard running into the gap, your dessert has reached the perfect thickness.
Remove the pan from the heat immediately to stop the cooking process. For an added layer of safety and a truly flawless texture, pour the hot custard through a fine-mesh strainer into a clean bowl to catch any microscopic bits of overcooked egg.
The Setting Phase and Skin Prevention
Once the custard is off the heat, it enters the cooling phase, which is just as important for texture development. Hot custard is still relatively fluid, but it will continue to firm up beautifully as the fat molecules cool and solidify into a cohesive structure.
A common challenge during cooling is the formation of a tough, rubbery skin on the top surface of the custard. This skin is caused by the evaporation of moisture from the hot liquid, leaving behind a concentrated layer of protein and fat.
To prevent this from happening, take a piece of plastic wrap and press it directly onto the wet surface of the hot custard, ensuring there are no air bubbles trapped underneath.
Let the bowl sit on your counter until it reaches room temperature, then transfer it to the refrigerator to chill completely for at least three to four hours. When you remove the plastic wrap later, the surface will be just as smooth and glossy as the center.
Creative Variations and Serving Suggestions
A masterfully prepared vanilla custard is incredibly versatile and can be enjoyed in numerous ways depending on the occasion.
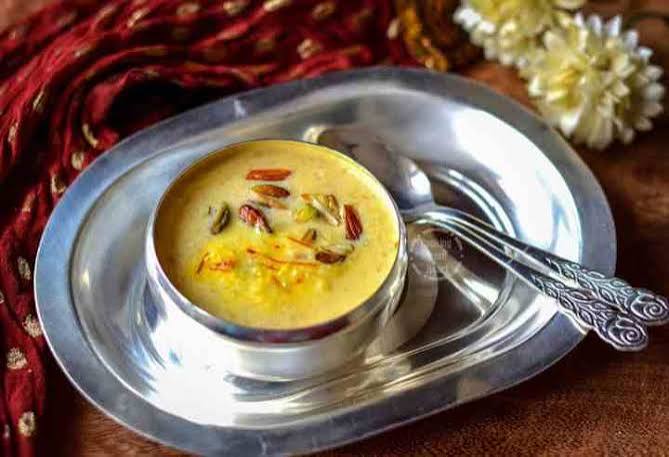
Serving it chilled in elegant glass bowls with a garnish of fresh raspberries, sliced strawberries, or a sprig of fresh mint makes for a light and sophisticated summer dessert.
For a comforting winter treat, serve the custard warm, pouring it generously over apple pies, fruit crumbles, or dense sponge cakes. The warm vanilla syrup seeps into the baked goods, elevating the entire dish into a luxurious experience.
You can also use this custard as a foundation for more complex desserts. Layering it with sponge cake, fruit jelly, and whipped cream creates a traditional English trifle, while freezing it in an ice cream maker yields an extraordinarily rich, old-fashioned frozen custard.
Proper Storage and Preservation Methods
Because custard contains high amounts of dairy and eggs, it must be handled and stored with care to maintain its fresh flavor and safety.
Always keep custard refrigerated when not serving, and never leave it at room temperature for extended periods.
Stored properly in an airtight container with plastic wrap pressed onto the surface, your classic vanilla custard will remain perfectly fresh and delicious for up to three days.